Phob2.0 -> NaxGCC Conversion
Converting a PhobGCC using a Phob 2.0 board to a NaxGCC is a fairly straightforward process. The first thing you will have to do is flash the NaxGCC firmware to your Phob board. And that's it, your Phob is now a NaxGCC! Well, not quite yet.
You'll notice that the GCC cable no longer works. The whole point of the NaxGCC is to connect to the Nintendo Switch directly via USB, after all. To do this, you have two options:
OlyU (Preferred Method)
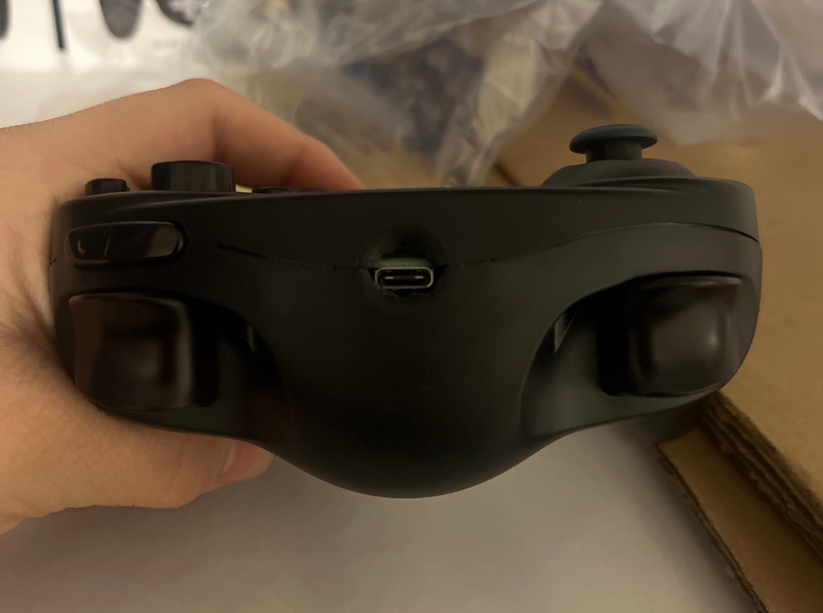
The OlyU is a small daughterboard for the PhobGCC that equips it with a USB-C connector at the back of the controller. This allows you to connect the controller directly to the Nintendo Switch, without the need for an adapter.
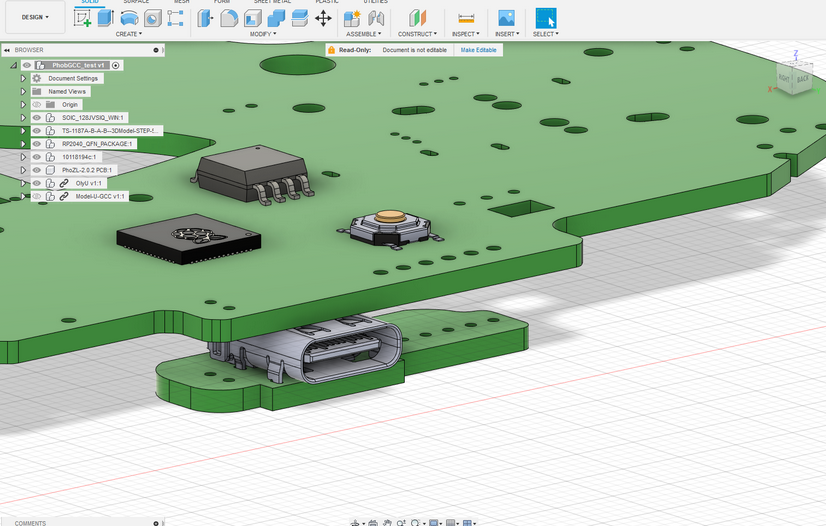
Minor soldering is required to attach the OlyU to the Phob board, and you will also need to make minor adjustments to the back of the controller shell to accommodate the USB-C connector:
The OlyU is an open source hardware project located here: https://github.com/sean44104/OlyU
Alternative Method
The alternative method involves modifying only your controller shell to allow a micro USB cable to connect to the Phob board. Usually this involves drilling or melting a hole in the bottom part of the shell, and then routing the cable through it.
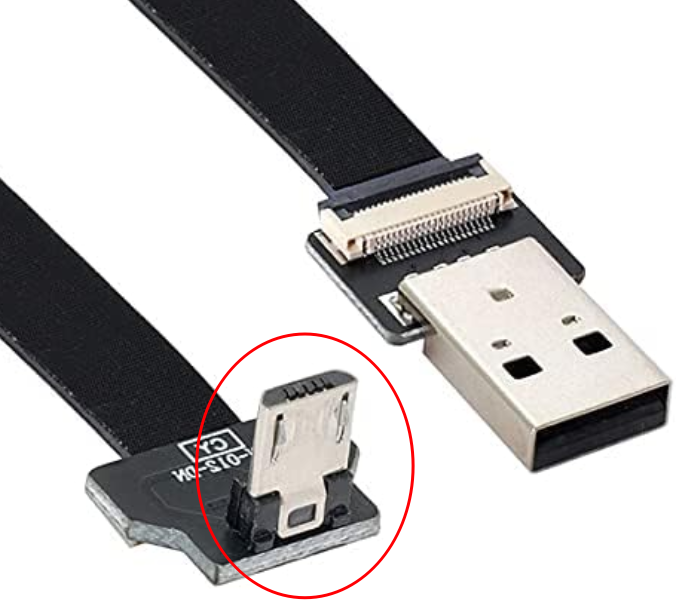
You will also need a right-angle micro USB cable to connect to the Phob board. This is because the clearance between the board and the shell is very tight, and a regular micro USB cable will not fit. Alternatively, you can drill or melt a hole in the top part of the shell, but this is not recommended as it will make the controller less comfortable to hold.
When choosing a right-angle micro USB cable to buy, keep in mind that the wide side of the trapezoid connector is going to be facing upwards when the controller is held normally. Most right-angle micro USB cables have the wide side facing downwards, so you will need to find one that fits this particular use case. Here's an example of what it should look like:
After flashing the firmware and making all the necessary modifications, it's now time to go ahead and configure your controller to your liking. Enjoy your new NaxGCC!