Configuring Your Controller
This page contains all the information needed for configuring & calibrating your controller. Click on any of the links below to quickly navigate to a given section.
- Initial Calibration
- Configuration Options
Initial Calibration
The calibration process for the NaxGCC is very similar to that of the PhobGCC, but it is not the same. Furthermore, changes may be introduced in the future that further cause the processes to diverge, so it is best to refer to this document as your source of information, as opposed to the PhobGCC's docs.
Before You Start
When first plugging in your controller after flashing the NaxGCC firmware, you will notice that your sticks don't work at all (even if you flashed the firmware onto a previously-calibrated Phob 2.0 board).
Don't worry, this is perfectly normal and expected, as the sticks first need to be calibrated to your specific magnet / magnet-mount combination, as well as the layout of your controller shell.
Calibration is not very complicated and usually only takes a few minutes to complete. To start, you will need:
- your NaxGCC
- a computer with the Dolphin emulator installed
- a copy of Smashscope
- a USB-C to USB-A cable in order to connect your controller to your PC
Getting Started
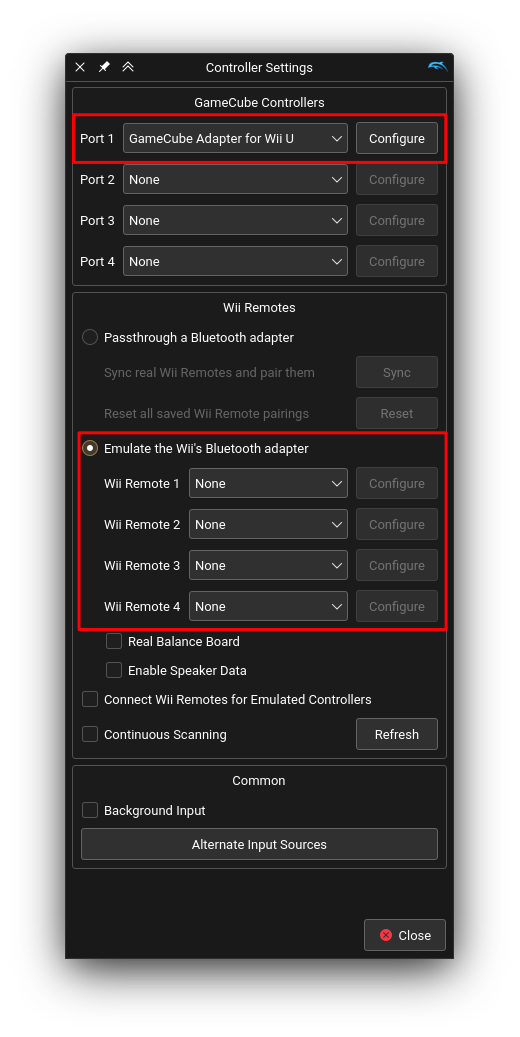
Before loading up Smashscope, ensure Dolphin's controller settings look like in the image below. Especially important is that you do not emulate any Wii remotes, as otherwise Smashscope will be unable to read your sticks!
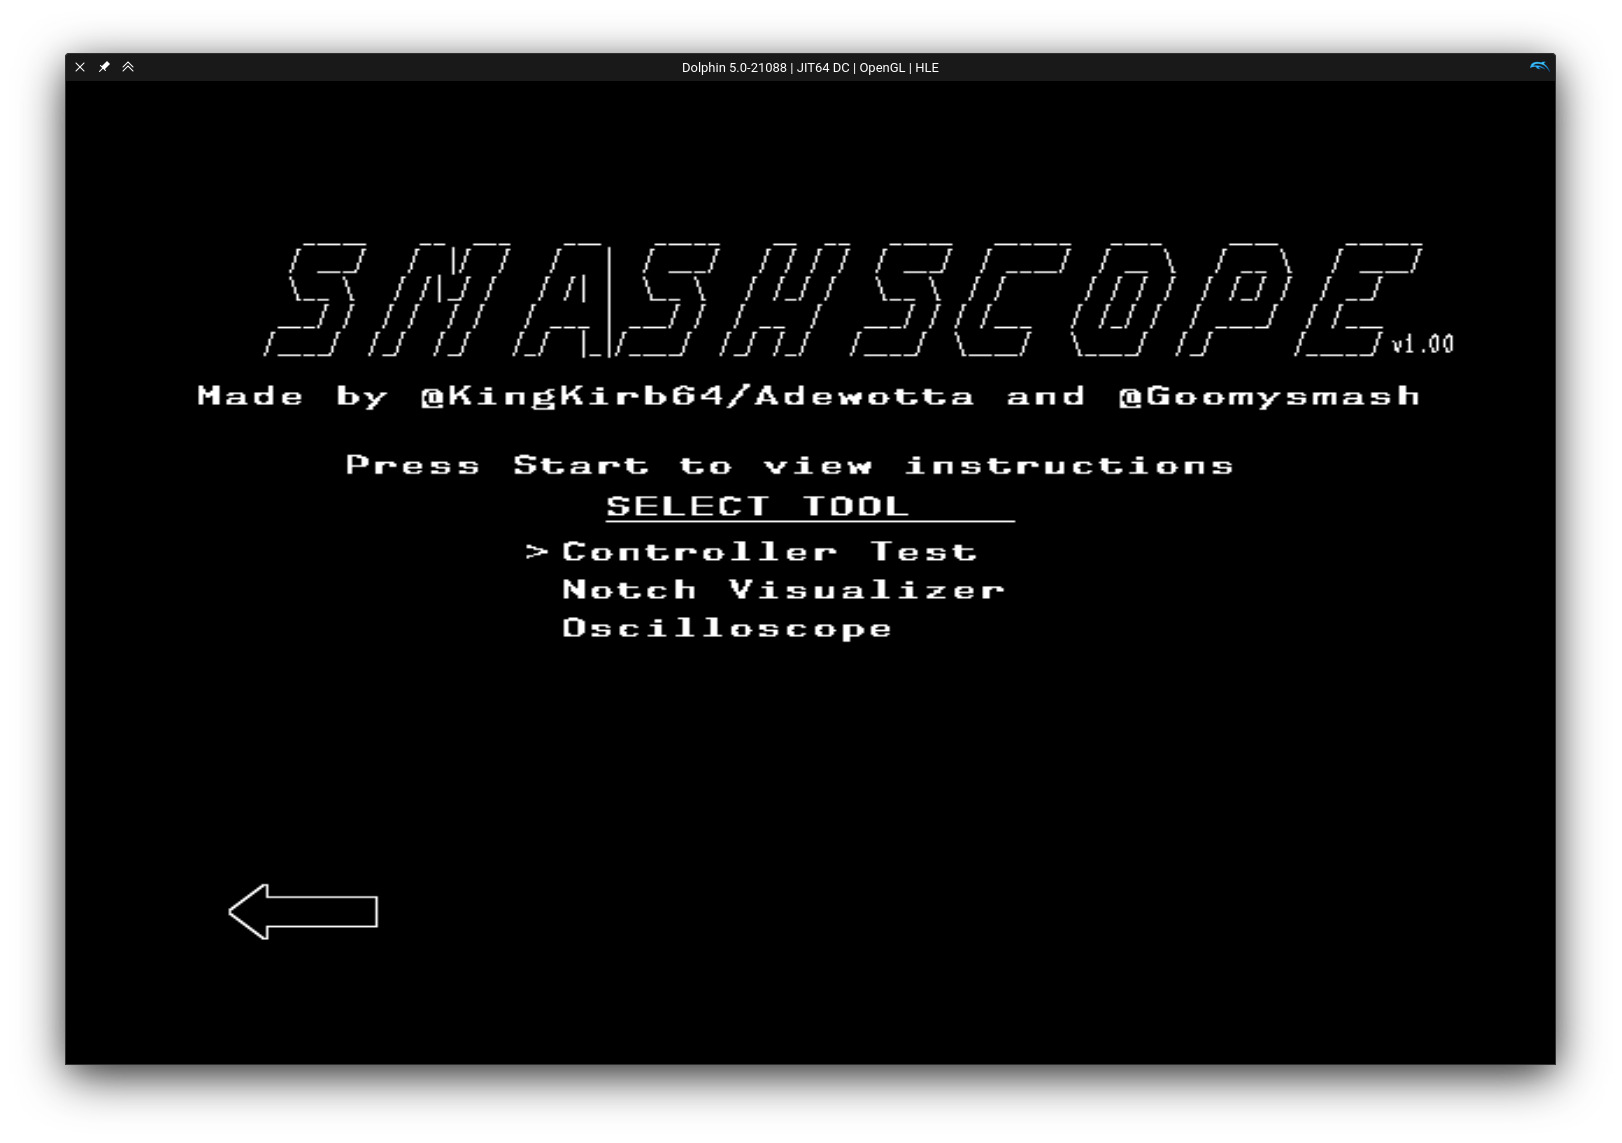
Start by powering up Dolphin and booting into Smashscope. You should see a screen similar to this:
If you haven't already, connect your controller now. Then press A in order to enter the "Controller Test" mode. You should see an image similar to this:
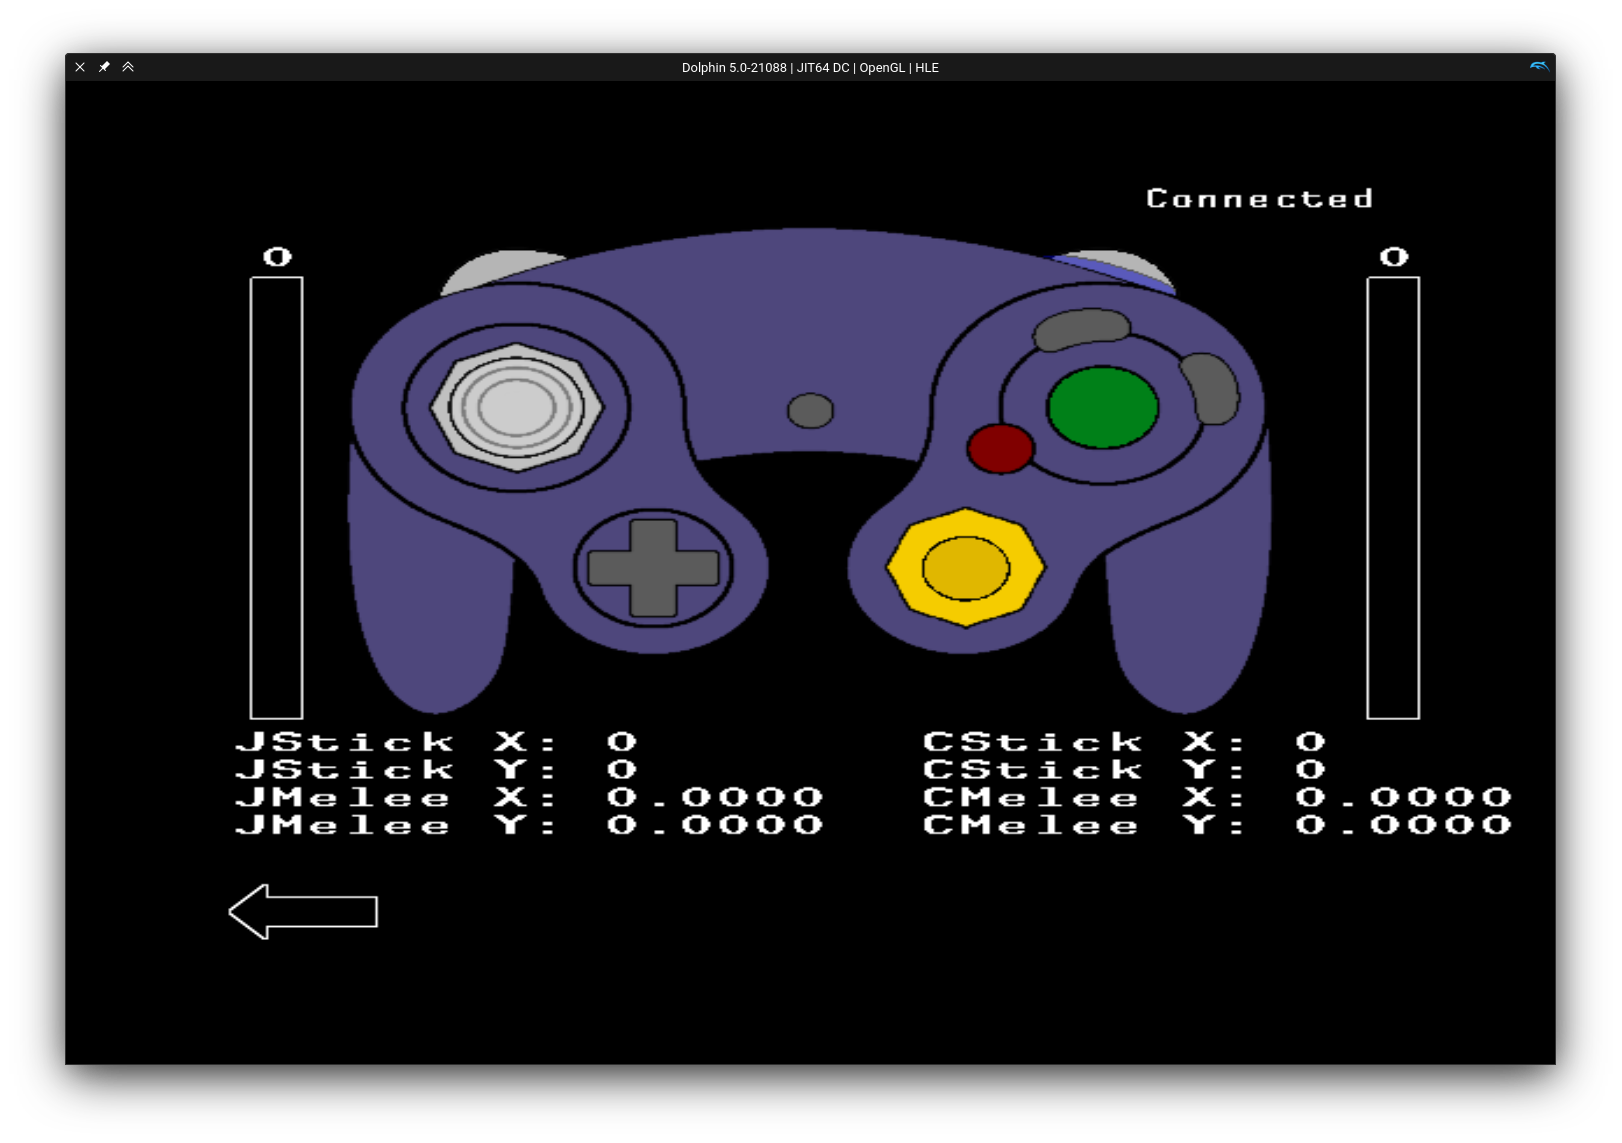
If your sticks don't look like this, but are completely out of whack instead, again, don't worry, this is to be expected. This screen will display any inputs you make on your NaxGCC in real time. Additionally, pressing the Z button will cause your NaxGCC to rumble.
Beginning Calibration
Now it's time to start calibrating your sticks. First, you will need to enter config mode by simultaneously pressing A+X+Y+Start. Your controller will freeze for one second while keeping the buttons held, and additionally pressing the triggers, before returning to its normal state. Now that you are in config mode, you have access to all calibration and configuration options.
Head on over to Stick Calibration and begin calibrating your control stick and your C stick. Once you've done so, it is highly recommended to determine whether your stick has any snapback (and how much), and configure the related snapback options in order to tone it down, or eliminate it entirely.
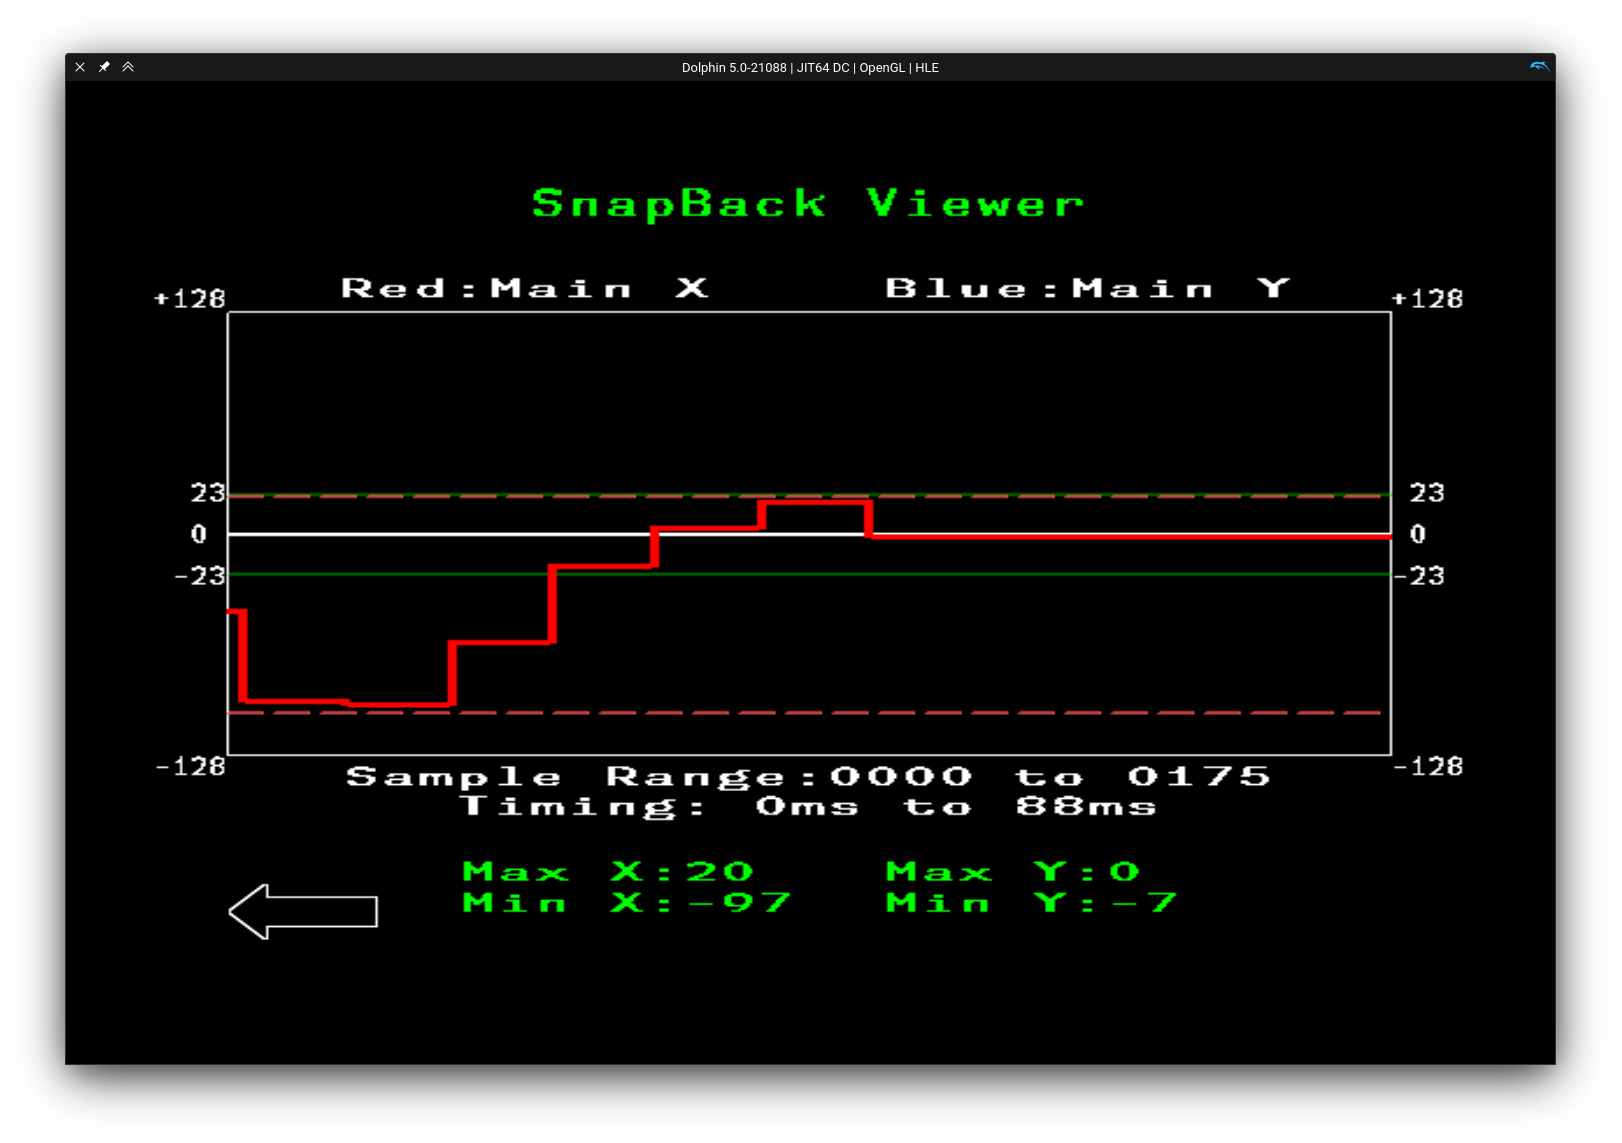
To do so, hold B to exit the "Controller Test" mode, and go into the "Oscilloscope" mode. In this mode, you can flick your stick left/right/up/down and see how far it extends into the opposite direction before returning back to center, giving you an easy-to-understand visualization of your stick's snapback. Your stick's X axis is displayed in red, and your stick's Y axis is blue.
For example, if you flick your stick to the left, ideally your Min X would be -100 (or another number far in the negatives) and your Max X would be 0 or close to 0. The more your Max X overshoots 0, the more snapback your stick has from left to right. The below screenshot shows a stick flick to the left with some snapback attached to it:
NaxGCC features a variety of snapback filtering options. Go ahead and give each one a try, you'll find that different options may have a bigger or smaller impact on your particular controller:
Adjust these in the "Controller Test" screen, then return to the oscilloscope to check the results.
Finally, after having tuned your snapback, you'll probably want to select your preferred Input Consistency Mode.
Configuration Options
These are all options you have while config mode is active. Config mode is activated by simultaneously pressing A+X+Y+Start.
When entering config mode, ensure you do not hold the A+X+Y+Start combo for multiple seconds. The reason is that the same combo is used to exit config mode, and keeping it held during config mode activation will cause you to immediately leave it again. It is recommended to enter config mode by holding A+X+Y and simply tapping Start.
Stick Calibration
Button Combo (Analog Stick): A+X+Y+L
Button Combo (C-Stick): A+X+Y+R
- Stick calibration has two phases: measurement and notch adjustment.
- During the Measurement Phase, you have the controller record the physical location of the corners of the gate and any modder-added notches.
- During the Notch Adjustment Phase, you can tweak the output angles of the notches you measured.
- You must complete both measurement and notch adjustment for the setting to be saved.
Measurement Phase
The first phase involves having the controller record the positions of the physical gate corners and notches as calibration reference points.
When in the measurement phase, the other stick's position (the one you're not currently calibrating) will alternate between the center and a position along the rim, starting with the cardinal directions. It shows you what you're supposed to do with the stick you're currently calibrating:
-
If the other stick is centered, let go of the stick you're calibrating and press
Ato record that position. -
If the other stick is not centered, move the stick you're calibrating into that position, ensuring that it is perfectly located within the notch, and press
Ato measure that position. -
You must measure all four cardinal directions (East, North, West, South) and all four diagonal directions or calibration will not work.
-
The first time you calibrate a controller that has modder-added notches, it is highly recommended to skip all the modder added notches and start with only the 8 primary directions.
-
Once you finish measuring all the notches (32 presses of
A), the stick should behave normally. You are not done calibrating. Proceed to the Notch Adjustment Phase below.If it does not behave as expected, see Measurement Phase Troubleshooting below.
Measurement Phase Troubleshooting
-
If the output of the stick you're calibrating is not accurate during this phase, do not worry. The previous calibration does not matter.
-
If the other stick is not alternating between being centered and circling all the way around the rim, you need to unplug and replug, and then restart Dolphin.
-
If after the measurement phase is done, the stick has one or two sectors that jump into another quadrant randomly, you probably mis-measured a notch. Mash
Aa bunch to finish the calibration and start again. -
If after the measurement phase is done, the stick output is completely haywire and jumping all over the place randomly, you may have let go of the stick before pressing
A. MashAa bunch to finish the calibration and start again.- Alternatively, if you have Firefox notches, try calibrating the main 8 directions only to completion, then go back and calibrate all of them.
-
If after the measurement phase is done, the stick output is backwards on one or both axes, you probably were trying to make the stick output match the other stick, instead of moving the physical stick into the notch indicated by the other stick. Mash
Aa bunch to finish the calibration and start again. -
If after the measurement phase is done, your stick does not perfectly move between
-100and100, but instead seems to be somewhat offset (either vertically or horizontally), you may need to ensure that the magnets you're using are mounted to have their polarity aligned. Consult the magnet mounting section of the hardware assembly guide for more information.
Notch Adjustment Phase
After the measurements are complete, this phase lets you adjust exactly where the non-cardinal notches are mapped to. This is useful, for example, if you want to ensure that you're getting up/down tilts when in one of the top/bottom corners, instead of forward tilts.
When in the notch adjustment phase, the other stick will stay along the rim and rotate along from notch to notch, starting with the diagonals. This indicates which notch is currently adjusted.
-
The position of the stick you're calibrating does not affect notch adjustment. The output is a live preview of how the calibration will be with your given adjustments, so feel free to move your stick around to see what it would be like.
-
Press
XorYto shift the output of the notch clockwise or counterclockwise, respectively.Note that you will only be able to actually observe the change when you're moving the stick to the notch that's currently being adjusted.
-
To discard your current modifications and reset to the default notch state, press
B. -
Press
Ato proceed to the next notch.
When the other stick's position returns to center, or resumes displaying the actual stick's position (which may be all over the place if it's not yet calibrated), the stick calibration is now saved.
Notch Adjustment Troubleshooting
-
If your notch coordinates are very inconsistent, try twisting the stick like a knob and see if the origin value shifts. If so, try gently tightening the screws holding the stickbox down; they may be loose.
-
If your notch coordinates have slightly different values when approaching straight from center compared to rolling clockwise or counterclockwise along the rim, this is normal (within two or three values).
-
If your notch coordinates cannot be adjusted to the desired value, check the other stick's coordinates to see if it's too far from the desired value. You can try recalibrating from the start and measuring it again, but it may not help. See a modder to get your notches adjusted if needed.
Smart Snapback Adjustment
Button Combo (Analog Stick): A+X/Y+Du/Dd
Button Combo (C-Stick): A+Z+X/Y+Du/Dd
This feature is currently unused for the C-Stick. While you can still adjust the values, changing them won't actually affect the stick's behavior.
Button combos for adjusting values for the C-Stick are the same as for the analog stick, with an added press of the Z button.
Increasing the stick Smart Snapback Filter adjustment doesn’t hurt responsiveness of the stick when moving away from the center. Increasing the value of this filter only makes it return to center more slowly.
-
Press
A+(Z)for your stick,X/Yfor your axis, andD-pad up/downto increase/decrease.- Example:
A+(Z)+X+Dusuppresses X-axis snapback more, andA+(Z)+Y-Ddsuppresses Y-axis snapback less. - When you change this setting, the current snapback filter settings are shown as the numerical coordinates on the stick you're adjusting.
- Example:
-
The scale goes from
-10to+10, and defaults to4.-
0completely disables the Smart Snapback Filter. This removes the rise time improvements, hurting dashdancing on the X axis, and you will have snapback. -
Positive values have strong rise time reduction that promotes fast tilt inputs into smash inputs.
Higher values have stronger snapback suppression.
-
Negative values minimize rise time reduction and make the stick behave more like an OEM controller.
More negative values have stronger snapback suppression.
-
Sticks usually need a setting of
4-7.9+is for special situations such as metal stick caps or lighter spring weights. -
If you have an OEM stick cap and snapback is still a problem, try setting the snapback filter to
0and check how far the snapback goes. If it goes past70, you may have to tame snapback by adding a bit of grease to the stickbox.
-
Press Du+Start while in config mode to display the smart snapback values on each stick.
Waveshaping Adjustment
Button Combo (Analog Stick): L+X/Y+Du/Dd
Button Combo (C-Stick): L+Z+X/Y+Du/Dd
Button combos for adjusting values for the C-Stick are the same as for the analog stick, with an added press of the Z button.
The Waveshaping filter stops the output from moving while the stick axis is moving quickly. This setting controls the threshold where that transition occurs.
This can be used to make short flicks behave more like a good OEM controller. This enhancement to flicks works best with an OEM spring or a Smalley L2 spring, not with lighter "slickbox" style springs, but you can crank it up and make it work at the expense of responsiveness.
- Press
L+(Z)for your stick,X/Yfor your axis, andD-pad up/downto increase/decrease- Example:
L+(Z)+X+Dustrengthens the effect on the X axis, andL+(Z)+Y+Ddreduces the effect on the Y axis. - When you change this setting, the current Waveshaping filter settings are shown as the numerical coordinates on the stick you're adjusting.
- Example:
- The scale goes from
0-15, and defaults to0.0disables waveshaping entirely.- Ideally, change both axes together.
Press L+Start while in config mode to display the waveshaping values on each stick.
Stick Scaling Adjustment
Button Combo (Analog Stick): L+A+Du/Dd
Button Combo (C-Stick): L+Z+A+Du/Dd
This feature has simply been ported over from the PhobGCC for compatibility reasons, but is not very useful for Super Smash Bros. Ultimate. It is recommended to leave this setting at its default value of 100.
Button combos for adjusting values for the C-Stick are the same as for the analog stick, with an added press of the Z button.
The Stick Scaling setting allows the user to adjust what value the stick can reach at the edge of the gate. Super Smash Bros. Melee has a unit circle that ranges from -80 to +80, OEM Gamecube controllers range from roughly -100 to +100, and the GCC protocol allows for -128 to +127. The NaxGCC, just like the PhobGCC, hard limits its own stick outputs to a range from -125 to +125, but this setting corresponds to what you get immediately after calibration.
- Press
L+A+(Z)for your stick, andD-pad up/downto increase/decrease- Example:
L+Z+A+Dustrengthens the effect on the C-Stick, andL+A+Ddreduces the effect on the control stick. - When you change this setting, the current Stick Scaling filter settings are shown as the numerical coordinates on the stick you're adjusting.
- Example:
- The scale goes from
82-125, and defaults to100.- This changes the physical distance to the rim of the Melee unit circle.
- At
82, the rim of the Melee unit circle is basically at the rim of the controller, requiring larger motions for things like smash attacks. - At
125, the rim of the Melee unit circle is much farther in, requiring smaller motions for things like smash attacks.
Cardinal Snapping Adjustment
Button Combo (Analog Stick): R+A+Du/Dd
Button Combo (C-Stick): R+Z+A+Du/Dd
This feature has simply been ported over from the PhobGCC for compatibility reasons, but is not very useful for Super Smash Bros. Ultimate. It is recommended to leave this setting at its default value of 6.
Button combos for adjusting values for the C-Stick are the same as for the analog stick, with an added press of the Z button.
The Analog Stick Cardinal Snapping setting allows the user to adjust the width of the window around the cardinals around which the stick will snap to perfect 1.0.
- Press
R+A+(Z)for your stick, andD-pad up/downto increase/decrease- Example:
R+Z+A+Dustrengthens the effect on the C-Stick, andR+A+Ddreduces the effect on the control stick. - When you change this setting, the current Cardinal Snapping filter settings are shown as the numerical coordinates on the stick you're adjusting.
- Example:
- The scale goes from
-1to6, and defaults to6.- At
-1the stick will snap away from the cardinal so that the stick cannot output1.0cardinals at all. - At
0, the stick will not snap to cardinals at all. This is equivalent to OEM cardinal behavior. - Between
1-6, the stick will snap to the cardinal from that far away in both positive and negative directions.
- At
Axis Smoothing Adjustment
Button Combo (Analog Stick): R+X/Y+Du/Dd
Button Combo (C-Stick): R+Z+X/Y+Du/Dd
Button combos for adjusting values for the C-Stick are the same as for the analog stick, with an added press of the Z button.
Axis Smoothing is just a simple low-pass filter similar to a capacitor on a vanilla Gamecube controller. Increasing this setting slightly reduces responsiveness. If you have the Smart Snapback Filter disabled, you can use this to suppress snapback, or use both in conjunction if your snapback is really strong (though in these cases, it's often better to try and solve the problem from a mechanical angle).
- Press
R+(Z)for your stick,X/Yfor your axis, andD-pad up/downto increase/decrease- Example:
R+(Z)+X+Dustrengthens the effect on the X axis, andR+(Z)+Y+Ddreduces the effect on the Y axis. - When you change this setting, the current Axis Smoothing filter settings are shown as the numerical coordinates on the stick you're adjusting.
- Example:
- The scale goes from
0-9, and defaults to0.0disables axis smoothing entirely.
Press R+Start while in config mode to display the axis smoothing values on each stick.
Rumble Strength Adjustment
Button Combo: A+B+Du/Dd
- Press
A+BandD-pad up/downto increase/decrease the rumble strength. - The scale goes from
0to11.9is roughly equivalent to an OEM controller's rumble.0turns off rumble entirely.
- When adjusting, the current rumble strength will be displayed on the analog stick's Y axis.
Input Consistency Mode Toggle
Button Combo: A+Z+Start
Cycles the input consistency setting through its three modes and displays which mode is currently active on the analog stick's Y axis:
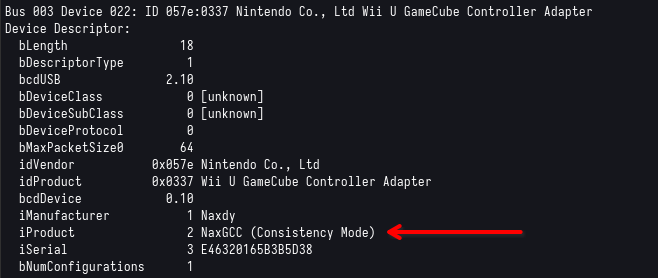
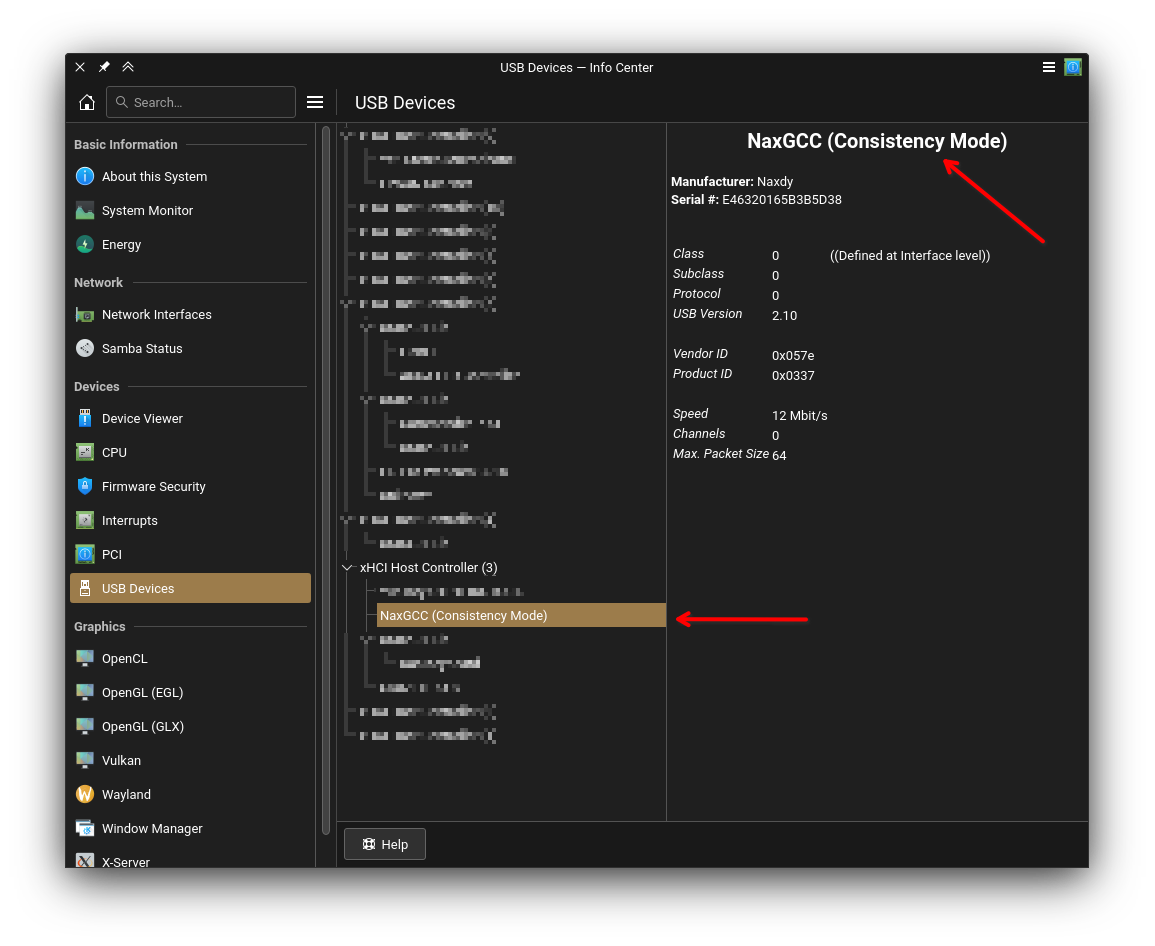
-69: "Regular" mode, same behavior as any other USB controller connected to the Nintendo Switch. Not recommended.-42: "PC" mode, same as Regular mode, except the controller will ask to be polled at 1000Hz instead of 125Hz. Only recommended for playing on PC, or other consoles that actually support 1000Hz. Do not use this mode on the Switch, it will not work, and might even cause issues with other USB devices.42: "Consistency" mode, aims to improve input consistency at the cost of input latency compared to "regular" mode on the Nintendo Switch - default setting.69: "Super Hack" mode, aims to improve input latency at a slight cost of input consistency compared to "consistency" mode. Currently experimental, not (yet) recommended for tournaments.
For more information about the different input consistency modes, consult the Input Consistency Mode list.
This setting will only become active upon unplugging and replugging the controller. The controller will then indicate the mode it's in by changing its device name. You can then use your operating system's device viewer to have a look at the device name and determine which mode is currently active. For example, under Linux you can run lsusb -v and look for NaxGCC:
Pro Controller Mode
Since: v1.2.0
Button Combo: Start while plugging in the controller
Makes the NaxGCC present itself as a Nintendo Switch Pro Controller instead of a GameCube adapter with 1 controller connected. While in this mode, pressing Z+Start will behave like pressing the home button on a regular Pro Controller. Additionally, pressing L will press both L and ZL at the same time.
If you unplug your controller, then plug it in again without holding Start, it will once again show up as a regular GameCube controller.
Switch firmware version 19.0.0 suffers from a known issue with GCC adapters (including NaxGCC, which pretends to be one). It is recommended to use Pro Controller Mode if you are on Switch firmware version 19.0.0. If not, it is entirely up to personal preference.
Display Values
Display waveshaping values on each stick: L+Start
Display axis smoothing values on each stick: R+Start
Display smart snapback values on each stick: Du+Start