JLCPCB Parts Ordering
This is an illustrated guide to ordering NaxGCC PCBs via the JLCPCB Board House.
JLC Ordering Process Overview
This is very important, or else you will get nonfunctional boards.
- Preorder the SMD components that are in limited supply, as listed below.
- These are not stocked by JLC but they are stocked by distributors; JLC will order them and keep them in your name until you order boards that need them.
- Once ALL OF THE PARTS come in, only then order boards with assembly.
- You may need to wait a week or more.
- Do not order boards before you receive notification that ALL of your parts are available.
- If you order boards before parts are available, then they will be assembled without the parts and they will not function.
- Wait for your boards to come in.
Pre-ordering SMD components
Since the NaxGCC board is fully integrated, all of the non-GCC components are soldered onto the board at the board house. Some of these may be out of stock, and as such need to be pre-ordered before you place a board order. Pre-ordered components take on average 2 weeks to arrive at the JLCPCB warehouse after you pay for them. If a component takes longer, you can contact JLCPCB support for a more accurate timeframe of arrival.
The following parts usually have low stock and pre-ordering them is advised:
These part quantities are for a single NaxGCC board. You need to multiply them by the number of boards you plan to order.
You can only order PCBs in quantities of 5, 10, 15, 20, 25, 30, 50, or more. Do not order SMD components for amounts other than these or you will either have unused extra parts or unpopulated PCBs later.
if you're planning on swapping out the Winbond chip for a different one, note that the serial number reported by the NaxGCC upon plug-in may no longer be unique
you need 1 more cystal oscillator per order you plan to place regardless of how many boards are in the order
Once you've clicked on each link and added the quantities you need into your cart, click the cart icon in the top right, go to the "Parts Manager Tab", to the "Order Parts" subtab, to the "Cart" subtab as follows:
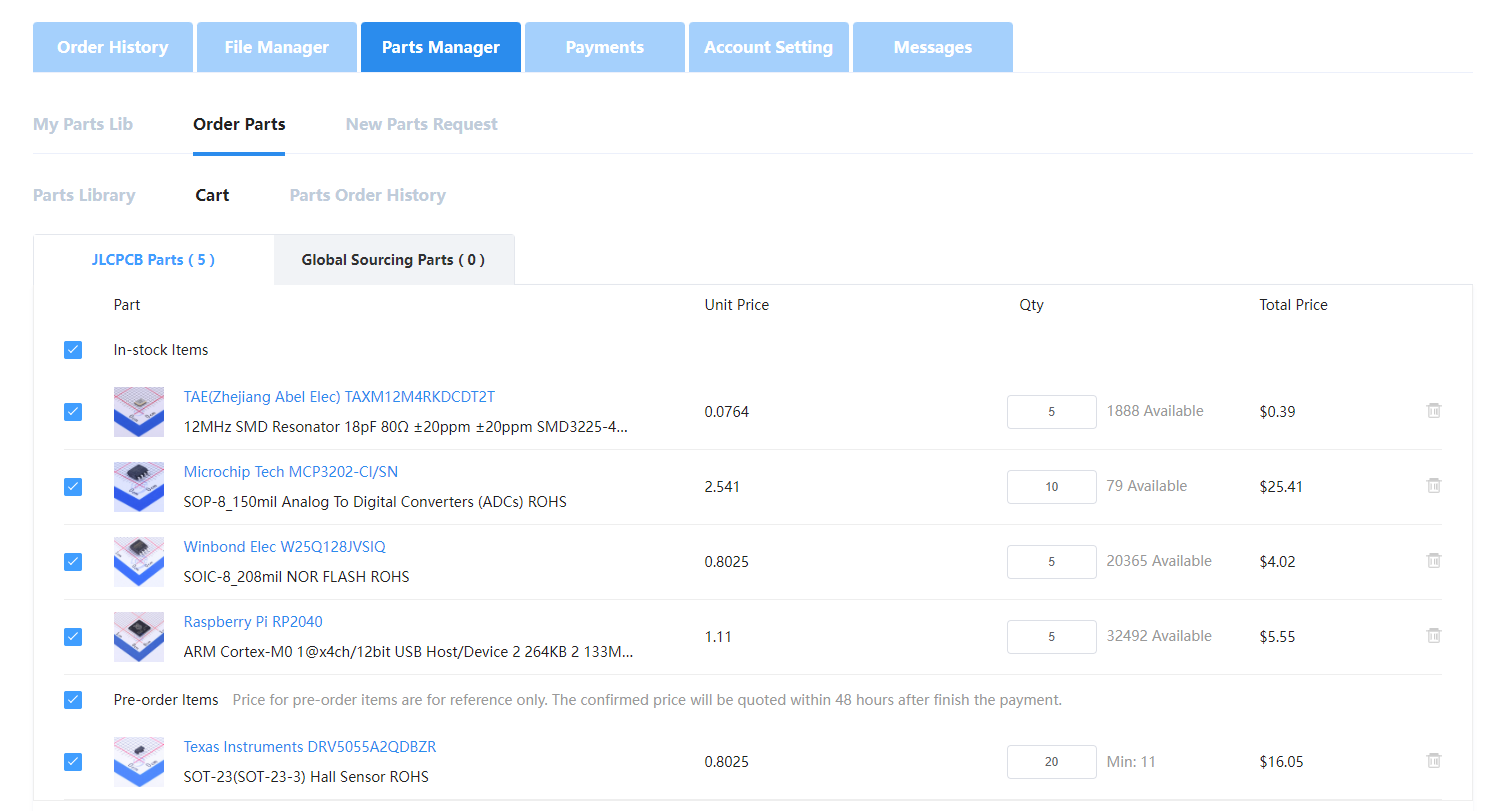
This is where you double-check the part quantities you've selected and make sure that they're all checked, even if in stock. Once you checkout, JLC will attempt to purchase those parts for you at the quoted price. If they end up costing more, they'll email you about supplementing the cost, and if they end up costing less, you will be refunded the difference. You can check the status of part orders in the "Parts Order History" subtab.
Some of the parts may be in stock and be available immediately. You must wait until ALL PARTS are available before proceeding. This may take one or two weeks.
Purchasing the NaxGCC board from JLCPCB
Once your pre-ordered SMD Components have come in (report as "Complete" in the parts order history), you may proceed to ordering boards. If they are not in, the parts will not be present on your board, and your board will not be functional.
Download the files available in the NaxGCC-HW git repo in the releases section as shown below:

Make sure to redownload the latest even if you already downloaded it in the past, as occasionally we make changes to the components to account for stock shortages or changes.
Once you've extracted the files from the .zip, you should have three files:
- NaxGCC_vX.X.X.zip (the gerber files)
- NaxGCC_vX.X.X_bom.csv (the bill of materials)
- NaxGCC_vX.X.X_top-pos.csv (the component placement file)
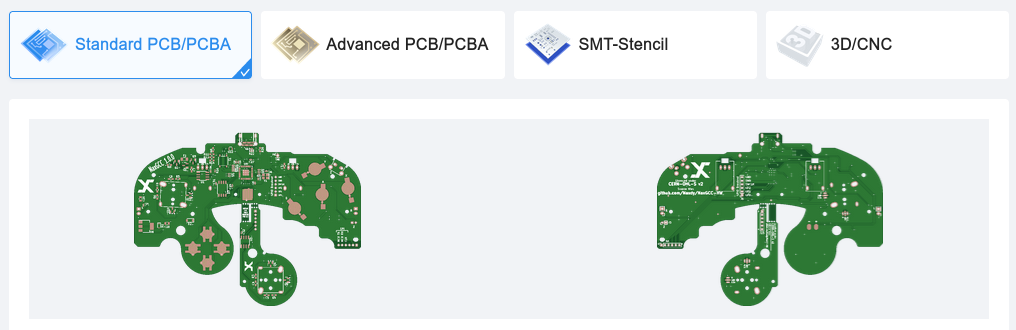
Click "Order Now" on JLCPCB, make sure you are set to "Standard PCB/PCBA" tab, click "Add Gerber File", and upload the NaxGCC_vX.X.X.zip. Once the files are uploaded, you should see the board process and then load in as shown below:
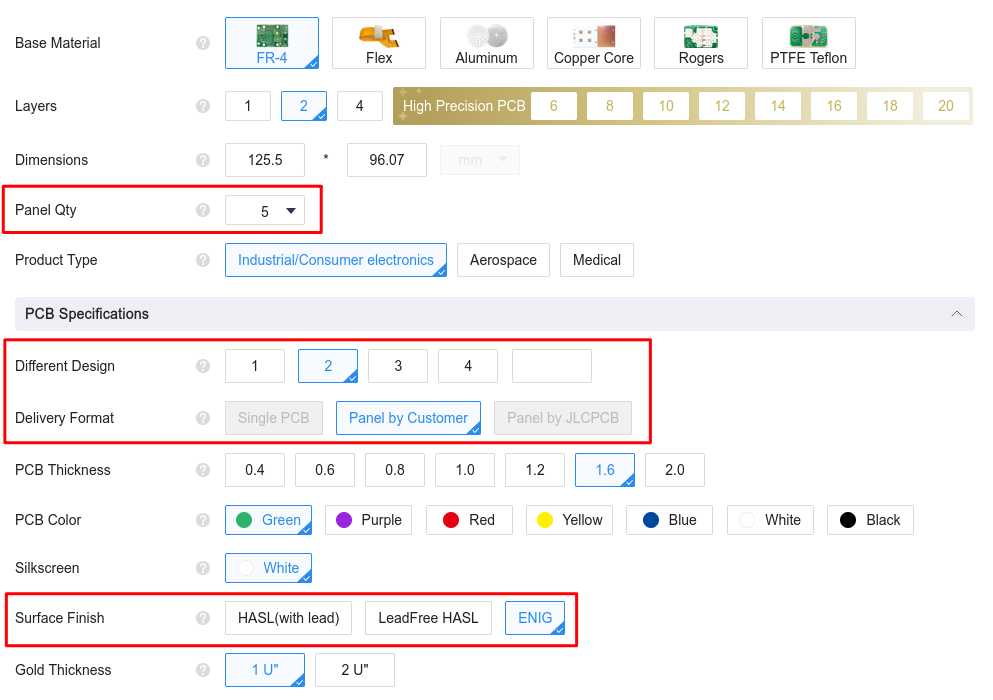
Once you've checked that the size is set to 96.07x125.5mm, you can progress with configuring it. The recommended settings are the defaults, setting your board quantity, setting "Different Design" to 2, and setting the Surface Finish to ENIG, as seen below:
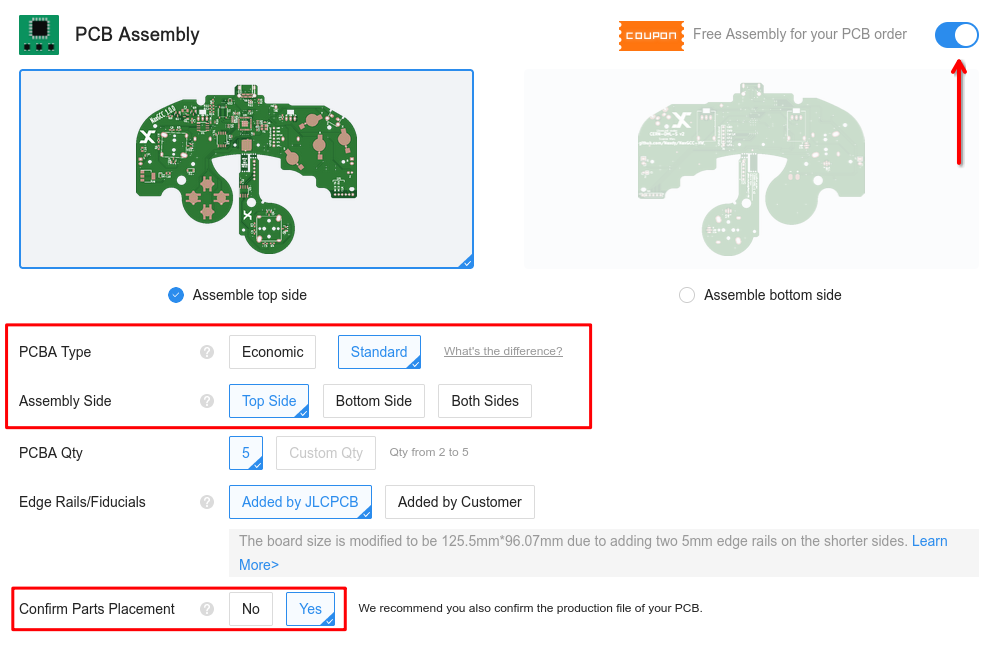
Scroll down to PCB Assembly and toggle it on the right. Select Standard PCBA Type (Not available for large orders or colors), the top side, and confirm parts placement as seen below.
For large orders such as more than 50 boards or different colors, Standard Assembly is required. This attaches removable rails to the PCB at a significant extra cost.
If arranging group buys or purchasing in large quantities, we strongly suggest using Standard PCBA so DOA boards are less likely.
Click "Confirm" and then upload the NaxGCC_vX.X.X_bom.csv to the left and and the NaxGCC_vX.X.X_top-pos.csv to the right. Set the usage description to Research/Education/DIY DIY HS Code and click "Next". The text at the top of the next screen should look like the following with all 25 confirmed.

The important part is that it should read 26 parts confirmed. Don't worry about the 11 parts not selected, as these are parts that will be added afterwards in the assembly process (stickbox assemblies, face buttons, etc.).
After clicking "Next", you'll be presented with a view of the parts on the board. If this screen is corrupted, that's okay. The files are known good and this is just the website bugging out. You want to make sure there are no red boxes anywhere as those indicate missing components. Ideally, the top view should look something like this:
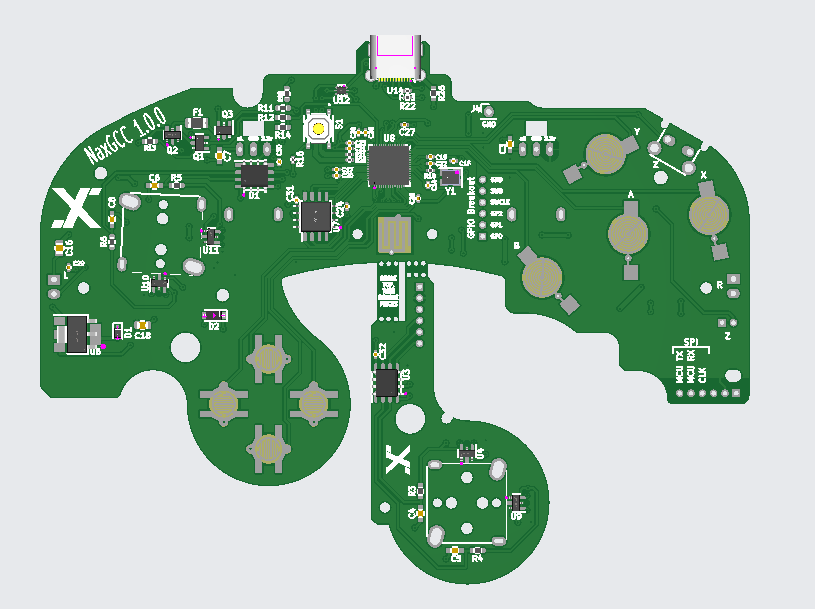
At this stage, don't worry if some components are in the right position, but rotated incorrectly. This should be corrected by JLCPCB later in the process, and this is why we selected "Confirm Parts Placement" earlier in the process, so you'll get to inspect the corrected parts placement before the order is put into production. You can then click "Save To Cart" and pay for your boards.
Later on, you will get a notification that the parts placement is ready for review. The corrected parts placement should look something like this:
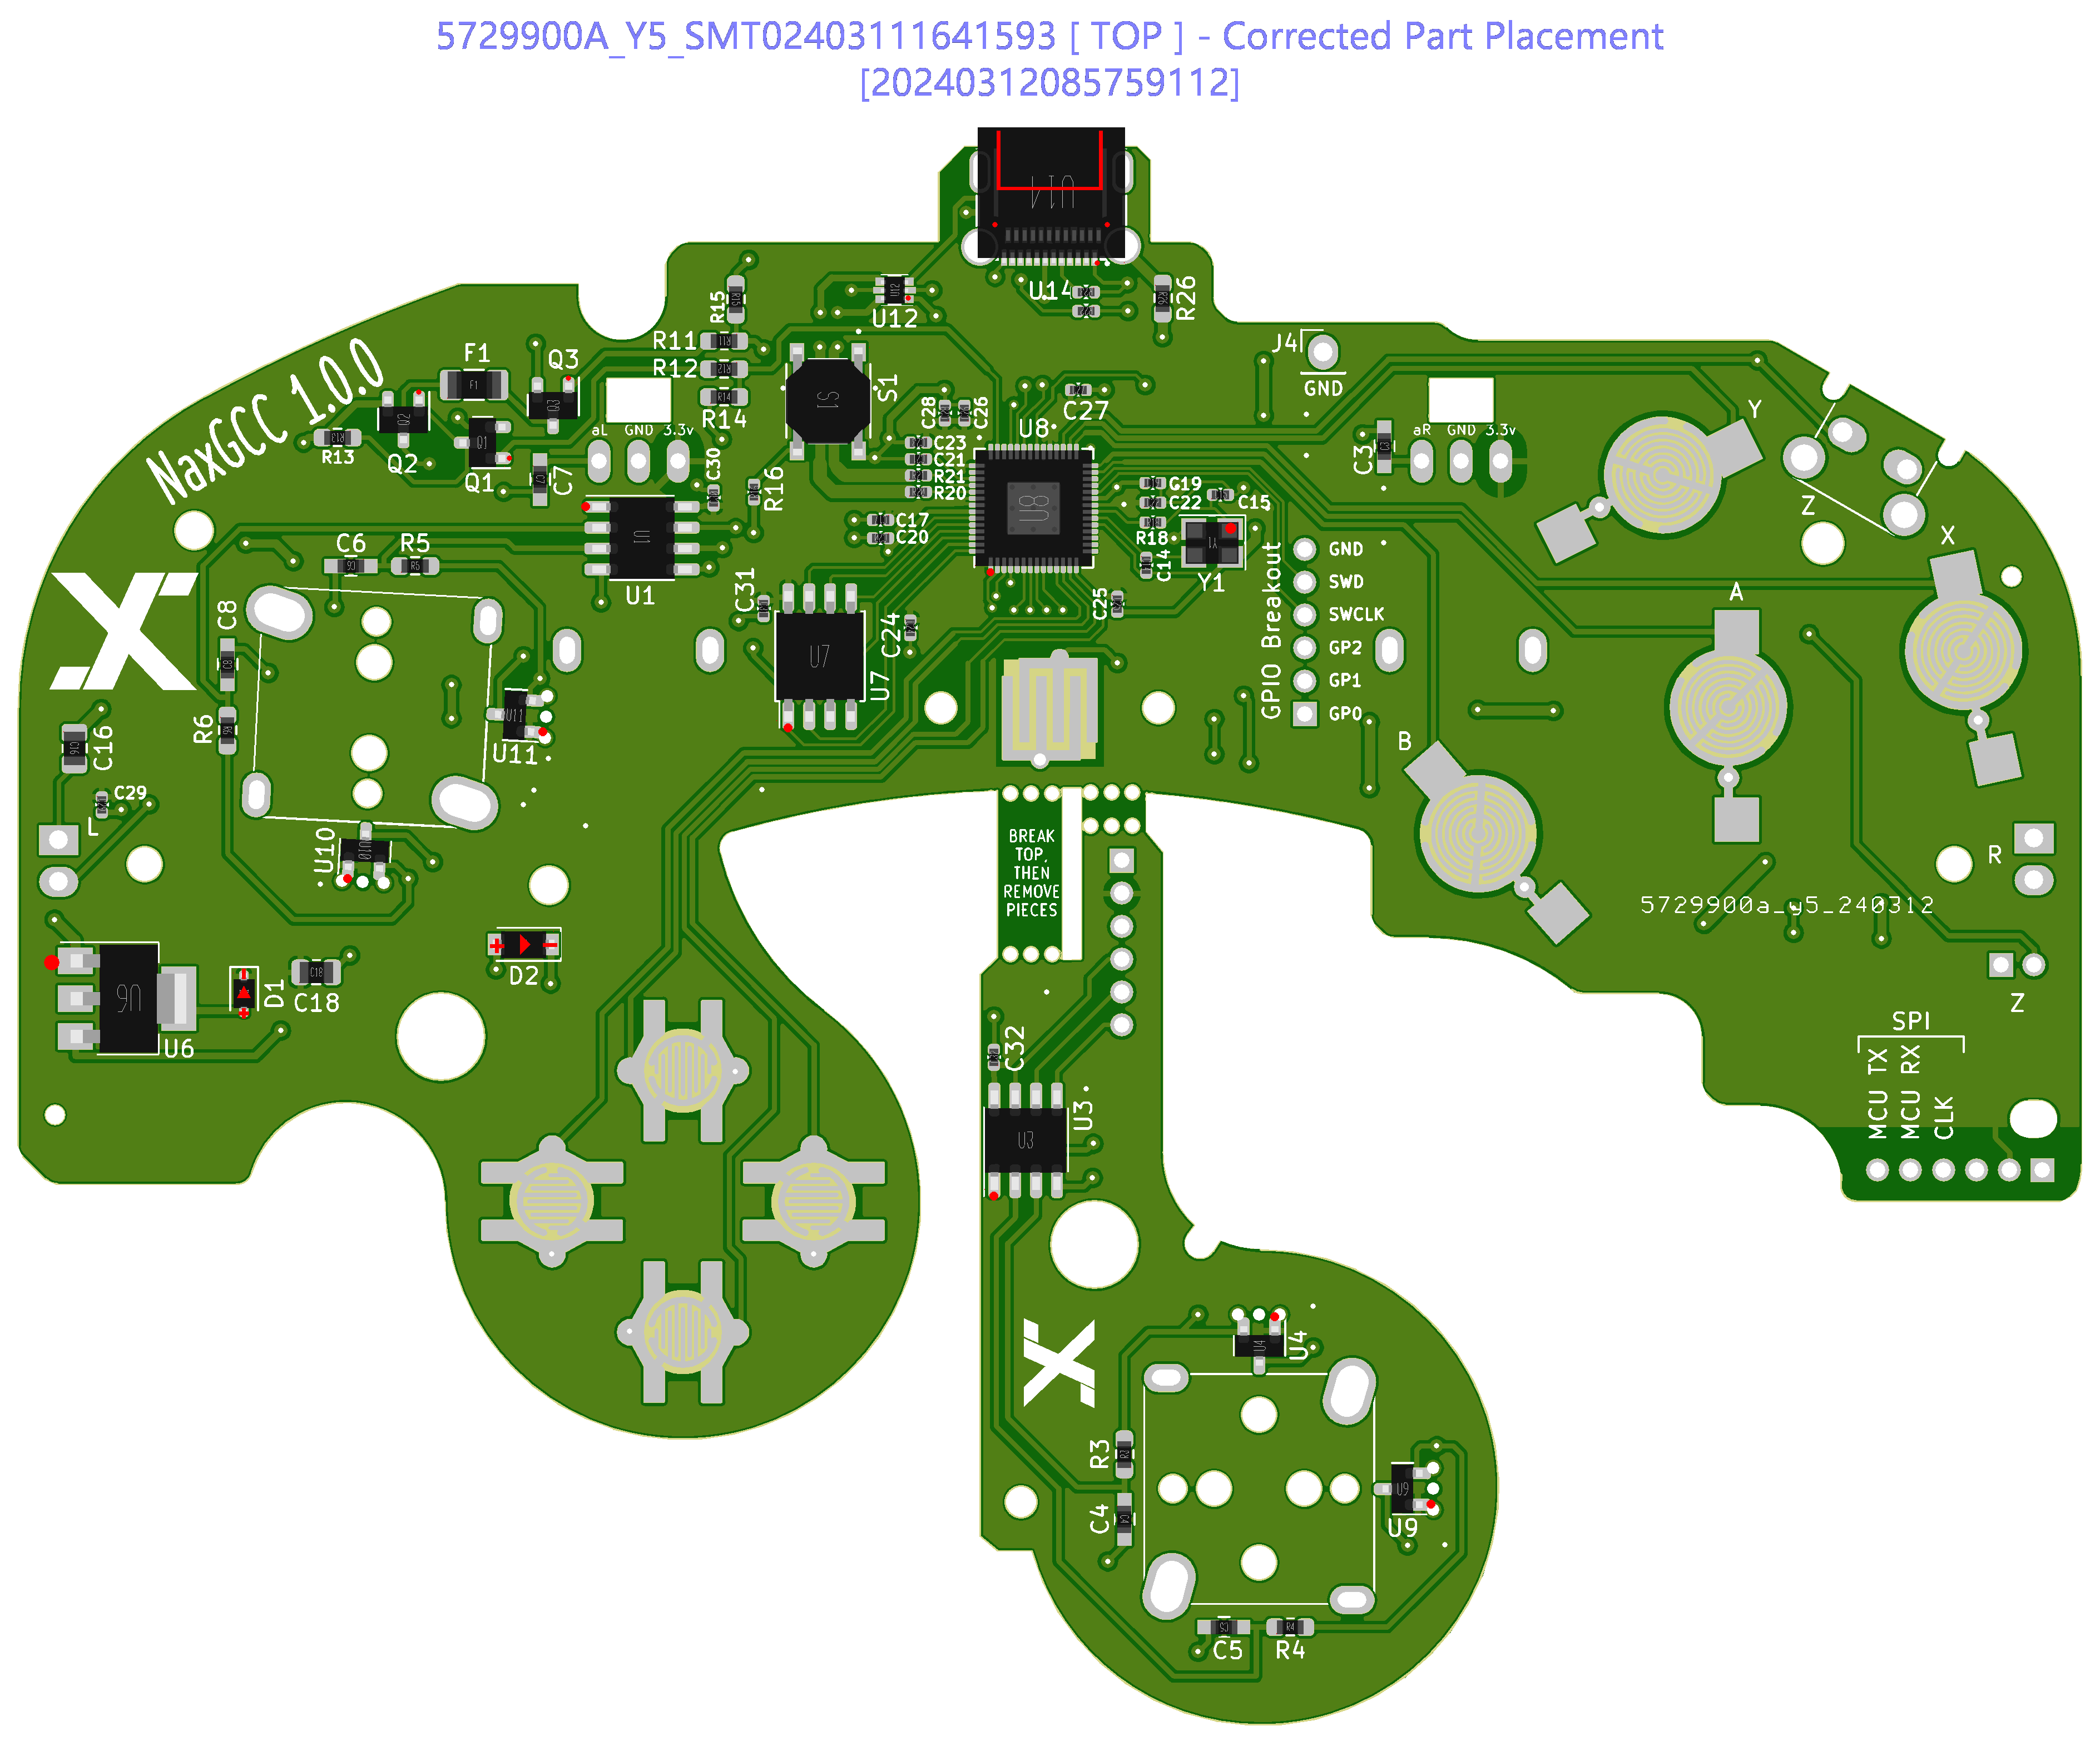
If everything looks good, go ahead and confirm the parts placement. Your boards will then be put into production and shipped to you as soon as they're done.